jpush.md 5.4 KB
极光
开启推送服务
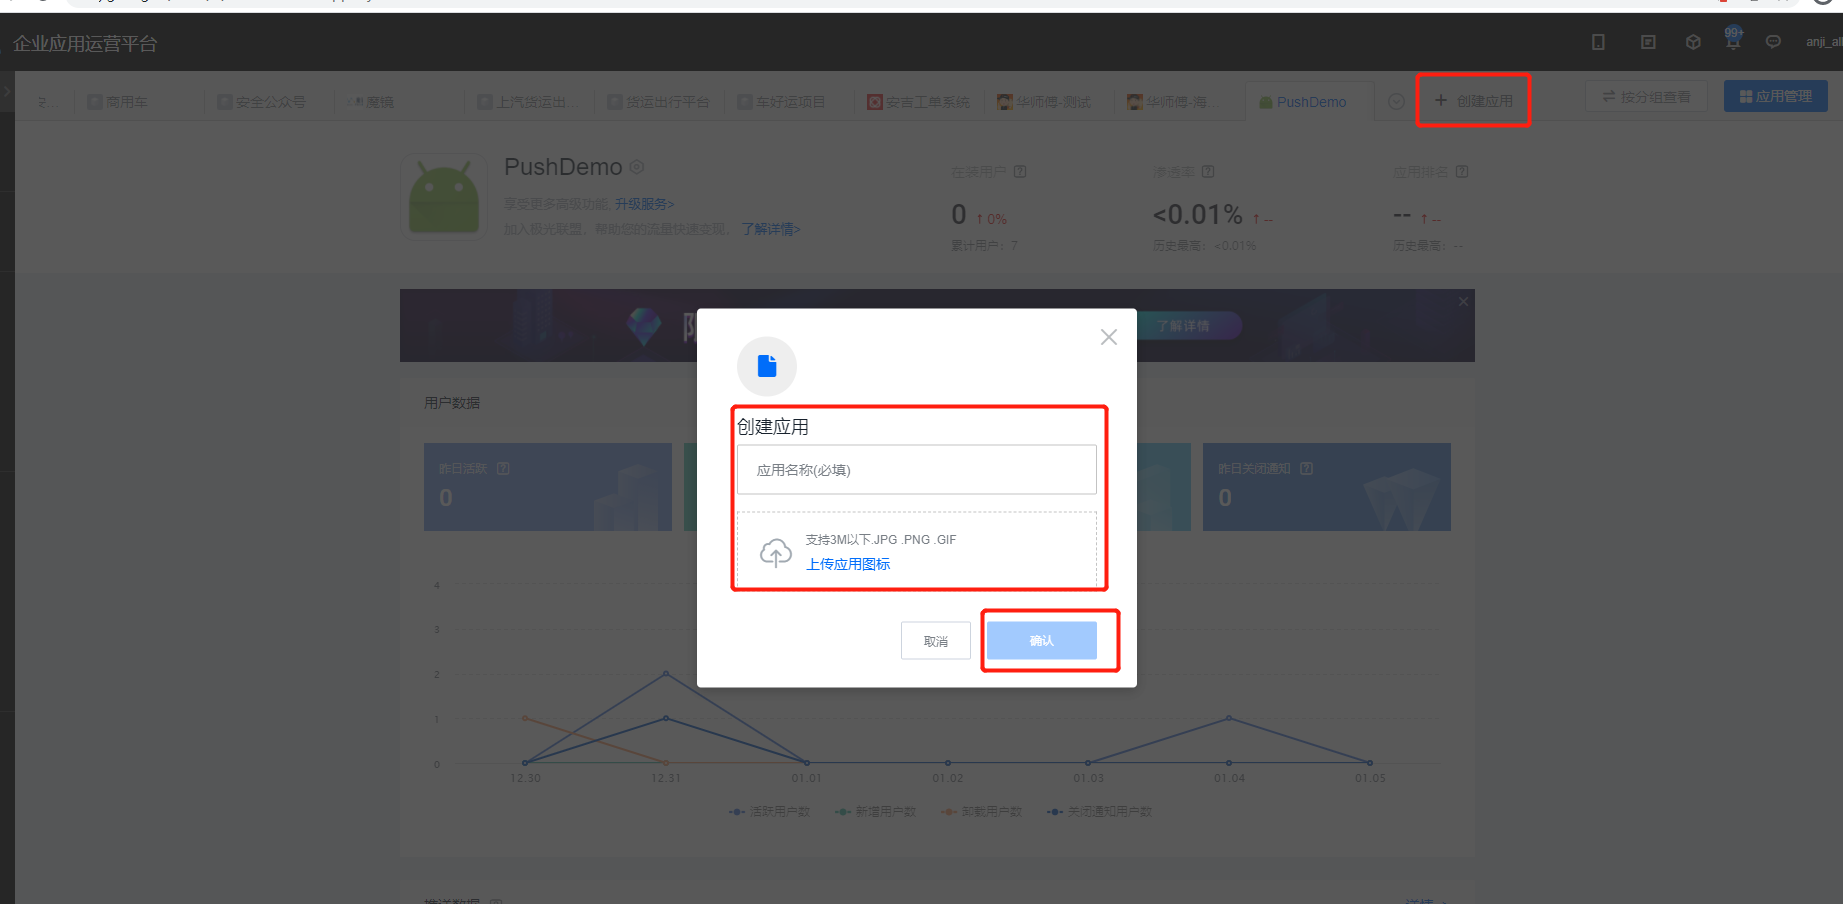
1、登录极光平台,点击“创建应用”,输入应用名和应用图标,如下图所示:
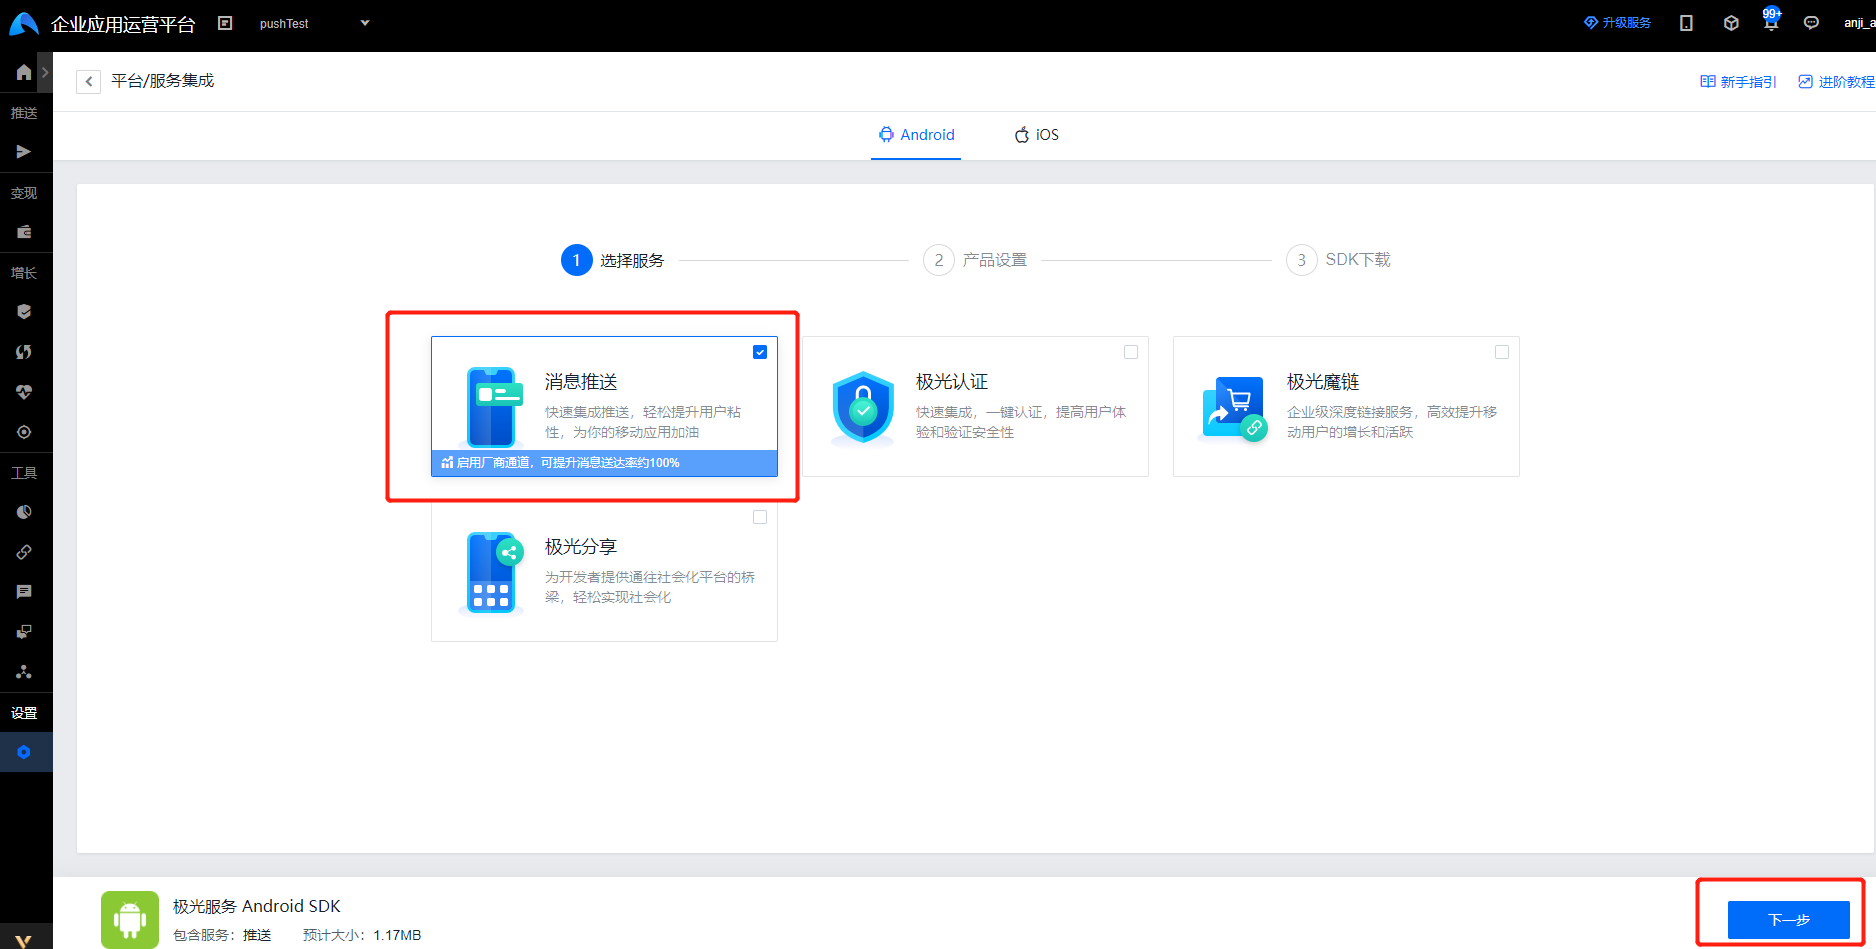
2、应用创建成功后,勾选"消息推送"服务,如下图所示:
3、在产品设置中,输入应用包名,如下图所示:

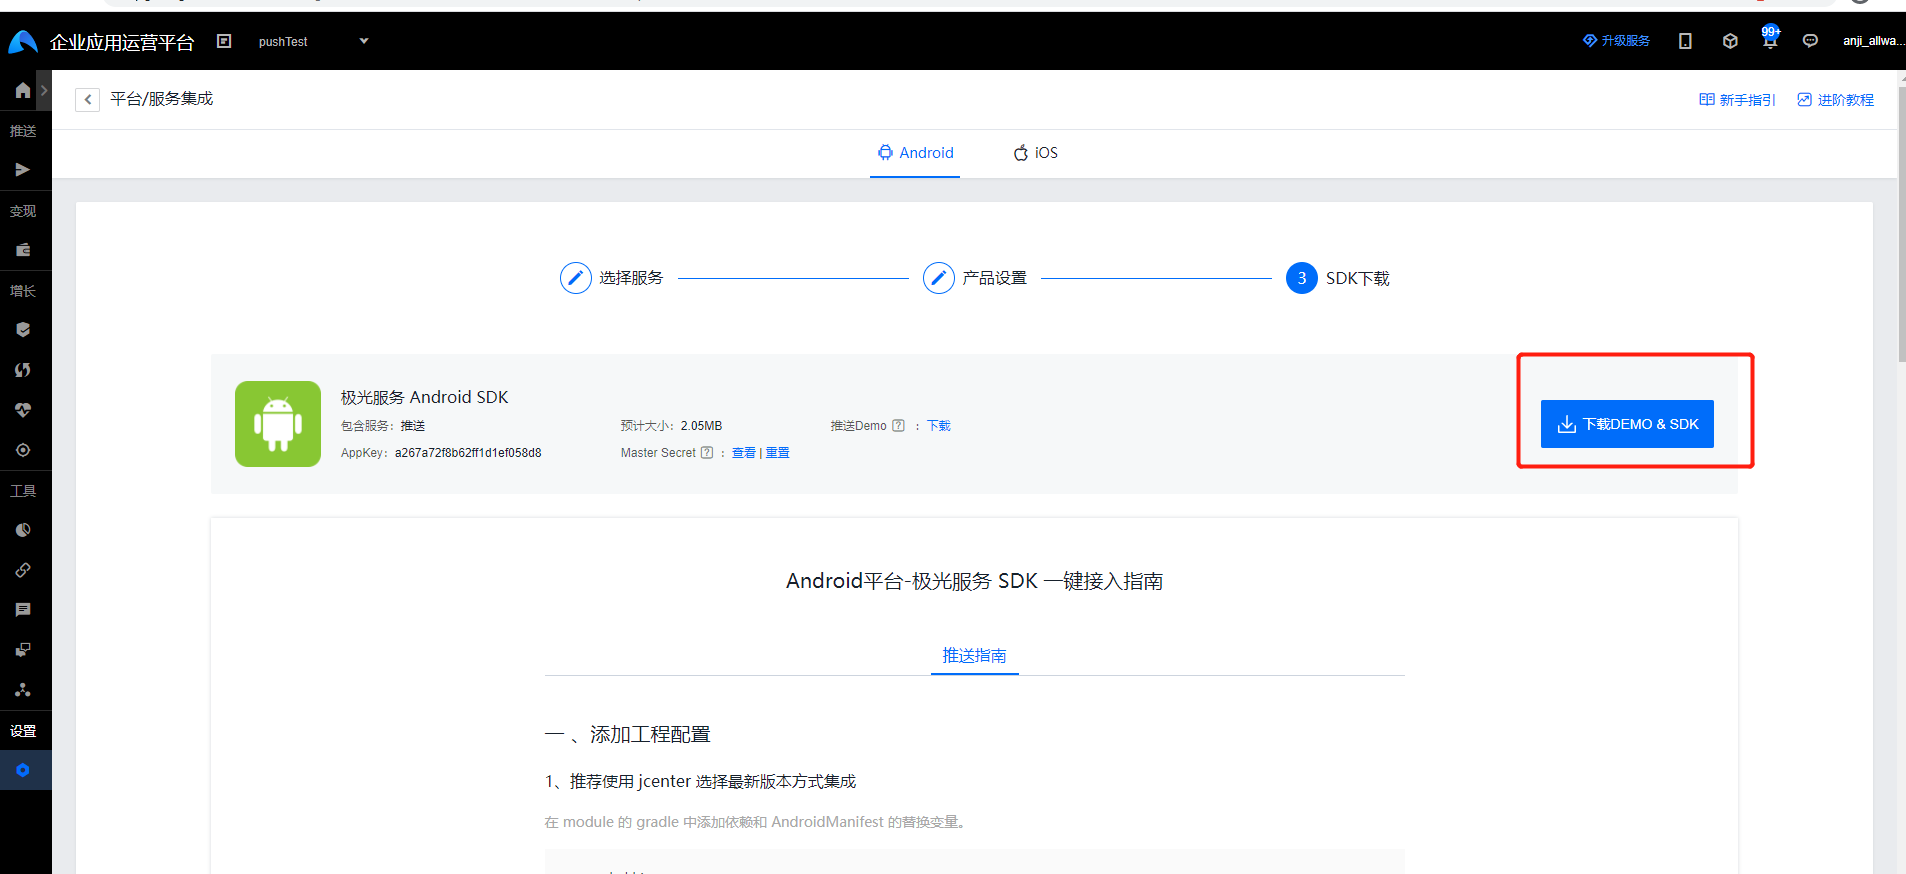
4、下载sdk ,如下图所示:
Jcenter 自动集成步骤
1、配置 jcenter 支持 确认 android studio 的 Project 根目录的主 gradle 中配置了 jcenter 支持。(新建 project 默认配置就支持)
buildscript {
    repositories {
        jcenter()
    }
    ......
}

allprojects {
    repositories {
        jcenter()
    }
}
配置AndroidManifest文件
1、在AndroidManifest文件中注册所需要的receiver和service
        <!-- User defined.  For test only  用户自定义接收消息器,3.0.7开始支持,目前新tag/alias接口设置结果会在该广播接收器对应的方法中回调 -->
        <!-- since 3.3.0 接收JPush相关事件 -->
        <receiver
            android:name=".jpush.PushMessageReceiver"
            android:enabled="true"
            android:exported="false">
            <intent-filter>
                <action android:name="cn.jpush.android.intent.RECEIVE_MESSAGE" />

                <category android:name="${applicationId}" />
            </intent-filter>
        </receiver>
        <!-- since 3.3.0 Required SDK 核心功能 -->
        <!-- 可配置android:process参数将PushService放在其他进程中 -->
        <!-- User defined.  For test only 继承自cn.jpush.android.service.JCommonService -->
        <service
            android:name=".jpush.PushService"
            android:exported="false"
            android:process=":pushcore">
            <intent-filter>
                <action android:name="cn.jiguang.user.service.action" />
            </intent-filter>
        </service>
应用开发
init 初始化 SDK
1、在application中初始化sdk
JPushInterface.init(this); // 初始化 JPush
自定义一个BroadcastReceiver类
自定义一个广播PushMessageReceiver,PushMessageReceiver继承JPushMessageReceiver。3.0.7开始支持,目前新tag/alias接口设置结果会在该广播接收器对应的方法中回调。 1、通知栏信息,在onRegister()获取唯一标识registrationId,并将registrationId上传到服务器
 @Override
    public void onRegister(Context context, String registrationId) {
        AppSpLog.e("[onRegister] " + registrationId);

        //將极光的registrationId保存再sp中
        SPUtil.put(context, AppParam.jPushRegId, registrationId);
        //send the Registration Id to your server...
        AppSpConfig.getInstance().sendRegTokenToServer(new IAppSpCallback() {
            @Override
            public void pushInfo(AppSpModel<String> appSpModel) {

            }

            @Override
            public void error(String code, String msg) {

            }
        });

    }
2、点击通知栏打开自定义页面,在 onNotifyMessageOpened()中通过intent跳转到指定的页面
        @Override
        public void onNotifyMessageOpened(Context context, NotificationMessage message) {
            Log.e(TAG, "[onNotifyMessageOpened] " + message);
            try {
                //打开自定义的Activity
                Intent i = new Intent(context, Main3Activity.class);
                Bundle bundle = new Bundle();
                bundle.putString(JPushInterface.EXTRA_NOTIFICATION_TITLE, message.notificationTitle);
                bundle.putString(JPushInterface.EXTRA_ALERT, message.notificationContent);
                i.putExtras(bundle);
                //i.setFlags(Intent.FLAG_ACTIVITY_NEW_TASK);
                i.setFlags(Intent.FLAG_ACTIVITY_NEW_TASK | Intent.FLAG_ACTIVITY_CLEAR_TOP);
                context.startActivity(i);
            } catch (Throwable throwable) {

            }
        }
3、透传消息,在onMessage()方法中获取服务器传来的透传信息
        @Override
        public void onMessage(Context context, CustomMessage customMessage) {
            Log.e(TAG, "[onMessage] " + customMessage);
            processCustomMessage(context, customMessage);
         }

        private void processCustomMessage(Context context, CustomMessage customMessage) {
        if (MainActivity.isForeground) {
            String message = customMessage.message;
            String extras = customMessage.extra;
            Intent msgIntent = new Intent(MainActivity.MESSAGE_RECEIVED_ACTION);
            msgIntent.putExtra(MainActivity.KEY_MESSAGE, message);
            if (!ExampleUtil.isEmpty(extras)) {
                try {
                    JSONObject extraJson = new JSONObject(extras);
                    if (extraJson.length() > 0) {
                        msgIntent.putExtra(MainActivity.KEY_EXTRAS, extras);
                    }
                } catch (JSONException e) {

                }

            }
            LocalBroadcastManager.getInstance(context).sendBroadcast(msgIntent);
        }
    }
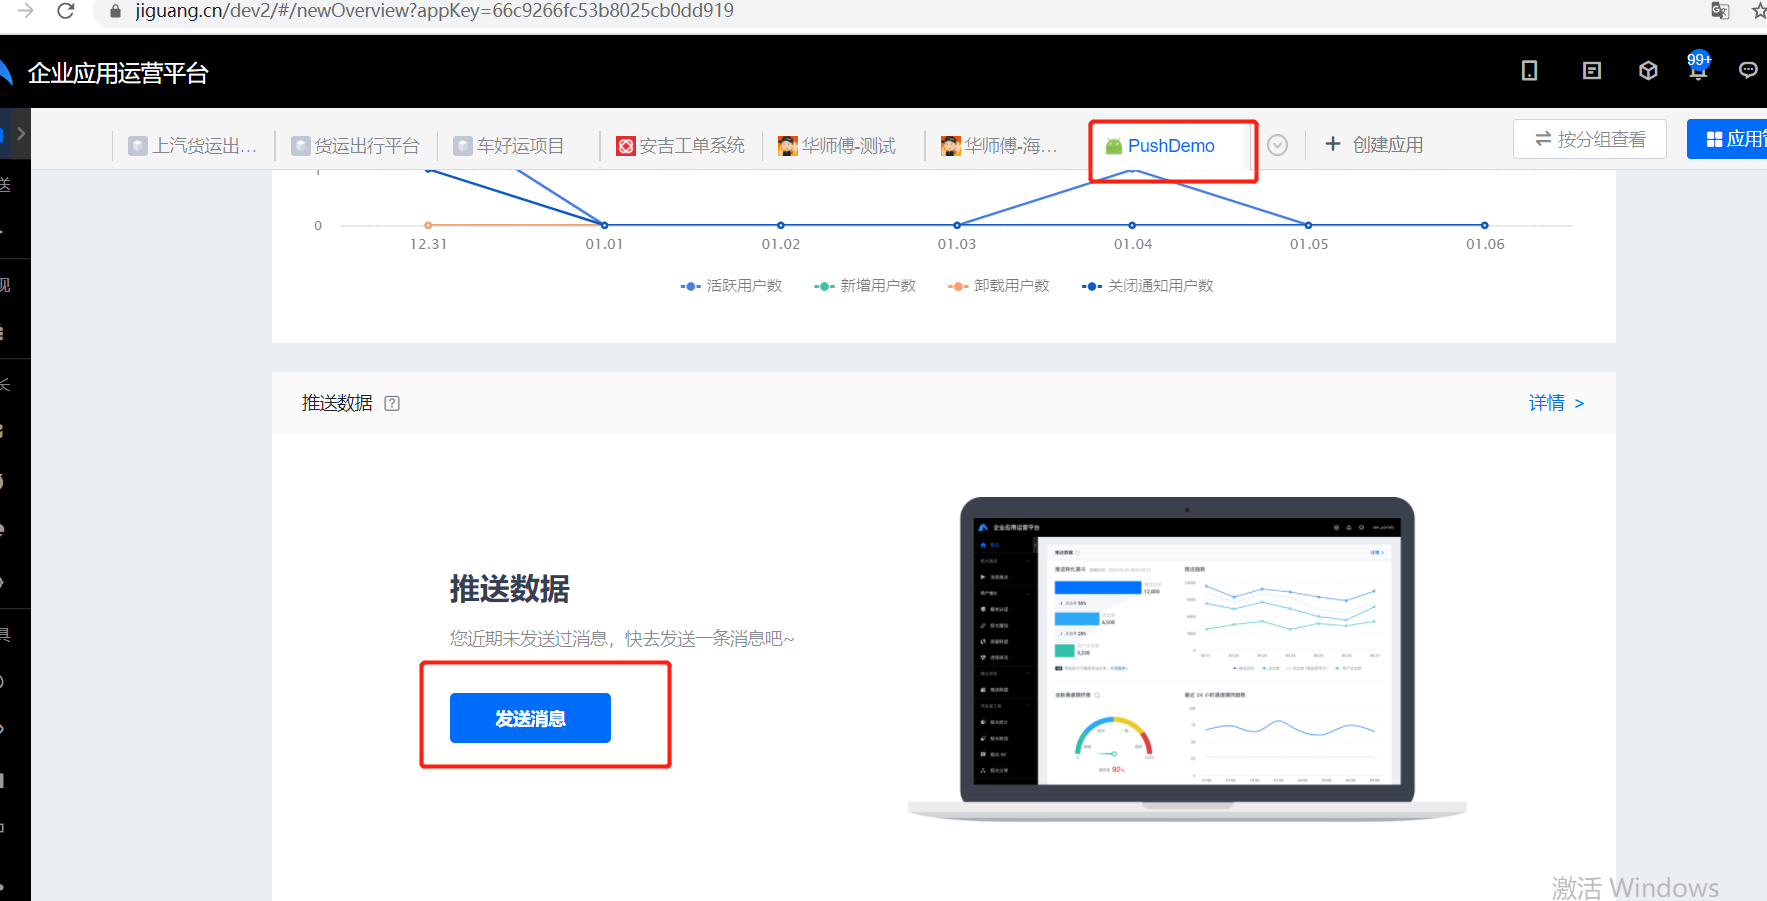
推送测试
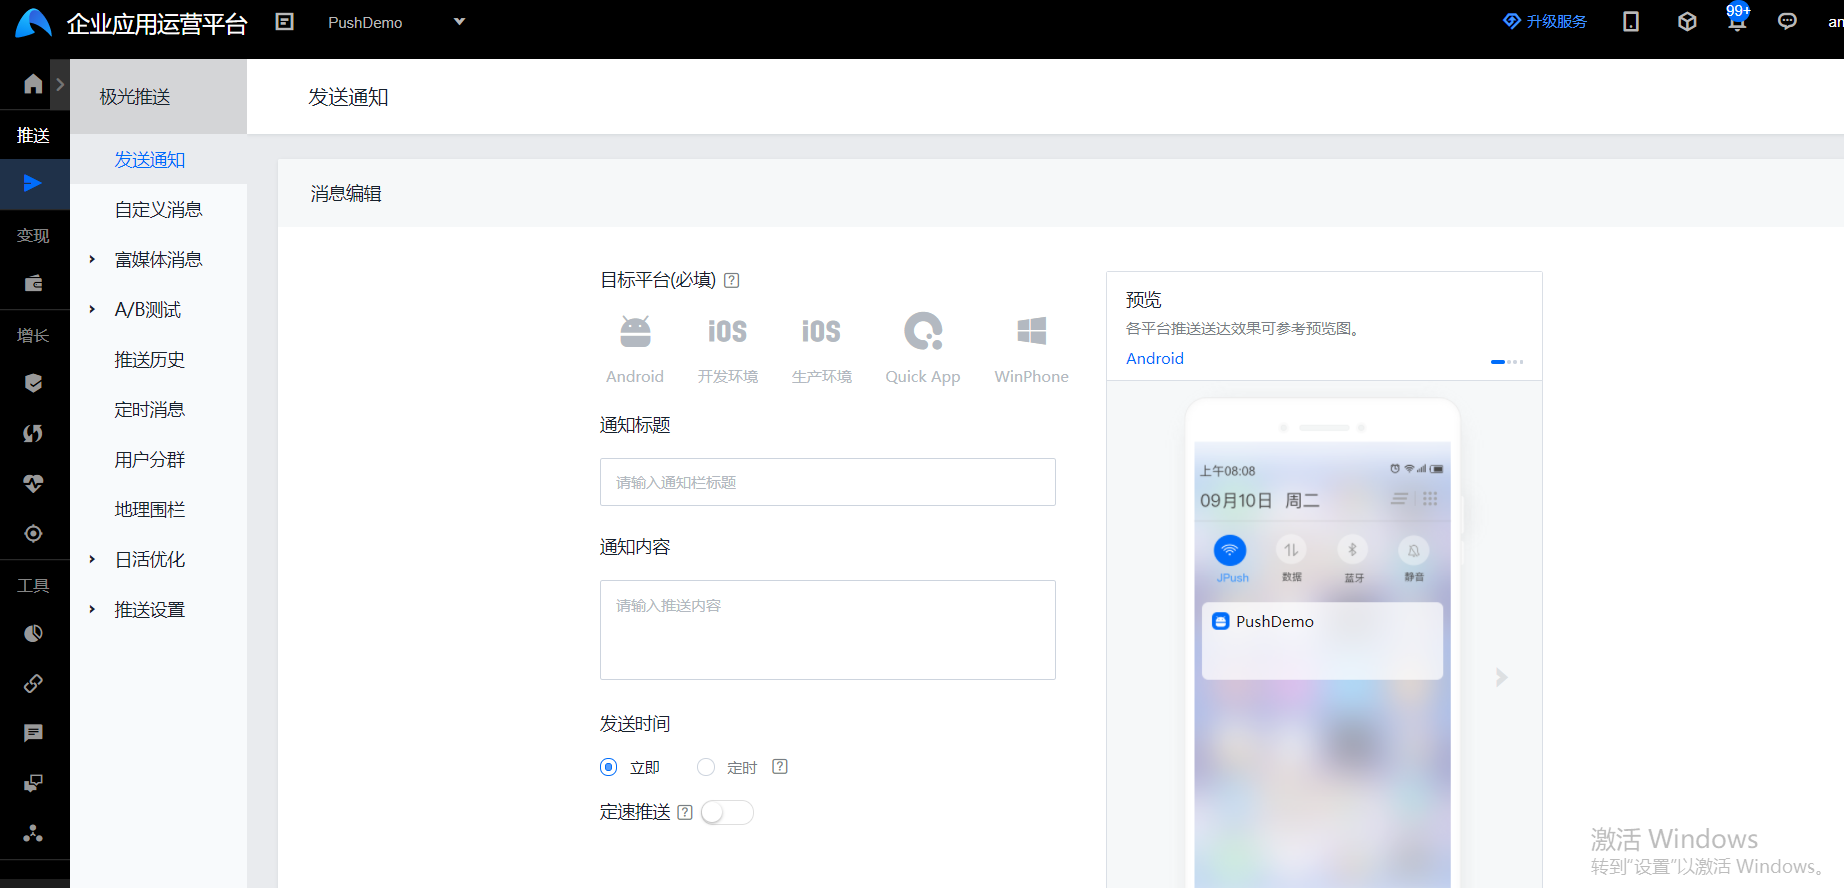
1、打开创建的应用,点击“发送消息”,如下图所示:
2、添加推送消息内容,如下图所示: