vivo.md 5.4 KB
vivo
开启推送服务
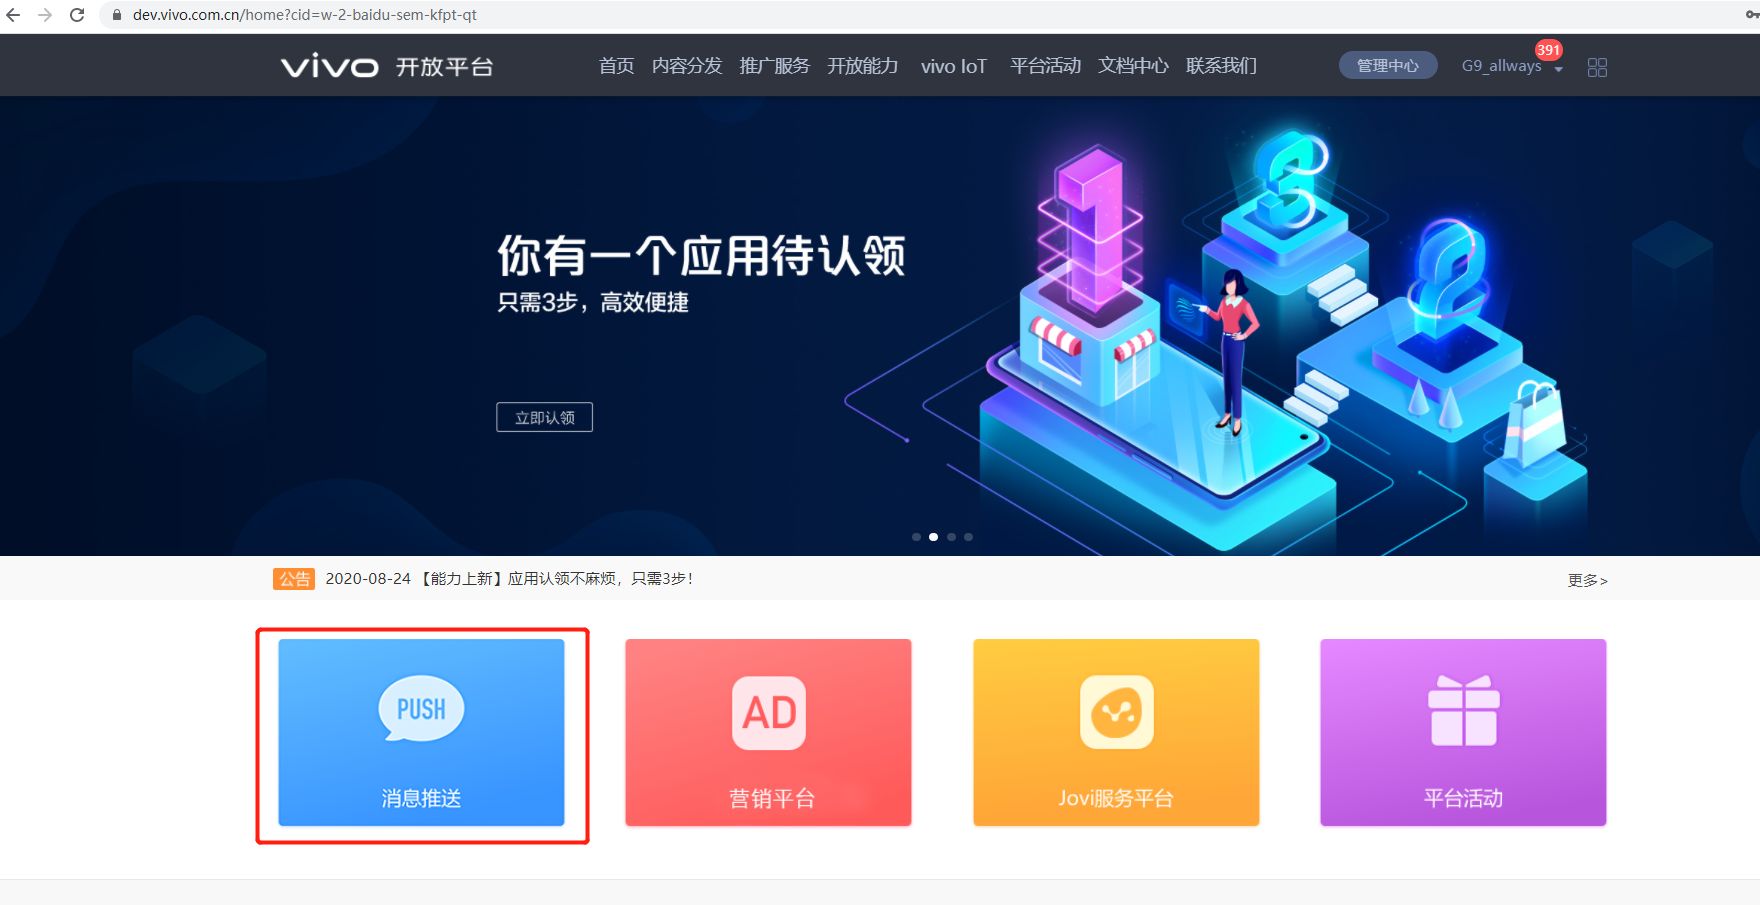
1、点击首页中的“消息推送”,如下图所示:
2、点击“推送申请” ,如下图所示
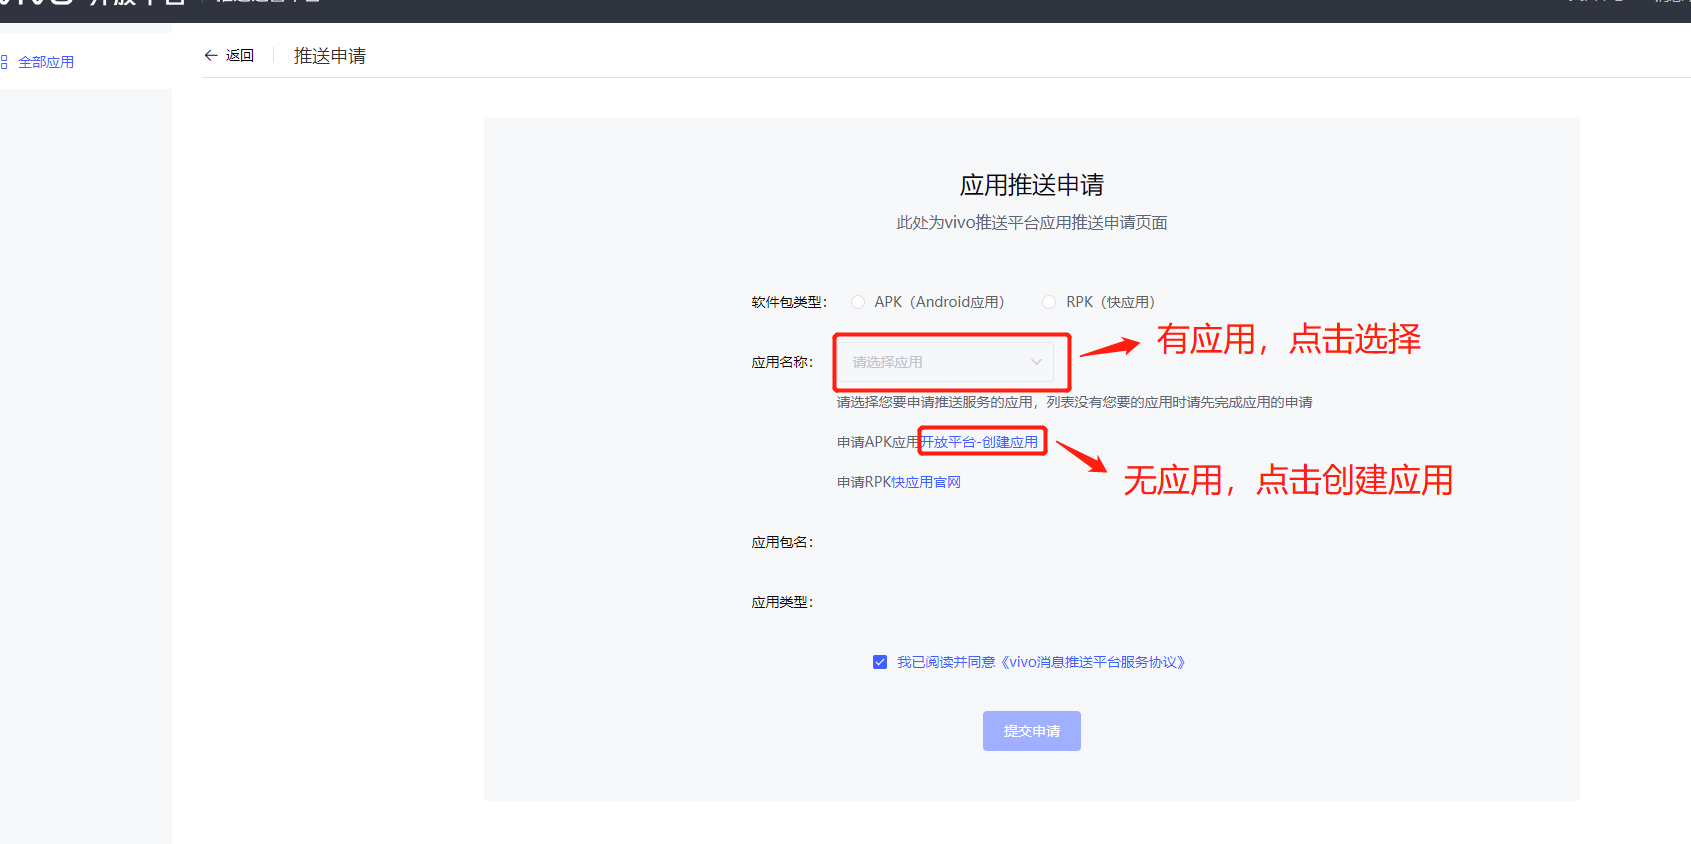
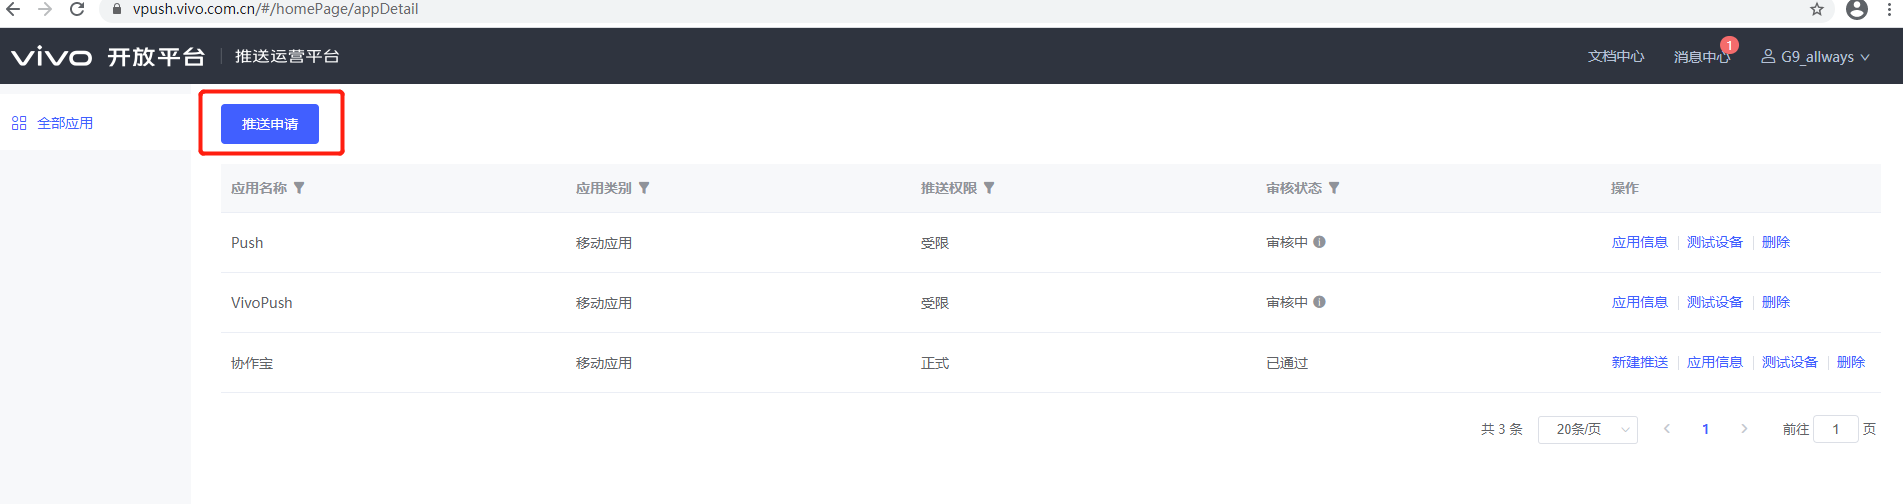 3、若应用已经创建,则选择应用,并提交申请,如下图所示
配置AndroidManifest文件
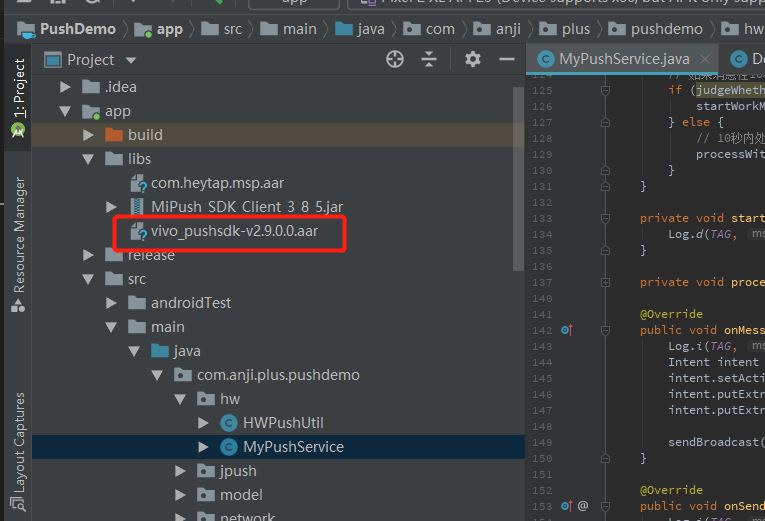
1、在lib包下面添加arr包,并在app目录下的build.gradle中添加aar依赖
2、在AndroidManifest文件中添加权限
<uses-permission android:name="android.permission.INTERNET"/>
3、在AndroidManifest文件中配置appid 、api key等信息
    <!--Vivo Push开放平台中应用的appid 和api key-->
    <meta-data
    android:name="com.vivo.push.api_key"
    android:value="xxxxxxxx"/>

    <meta-data
    android:name="com.vivo.push.app_id"
    android:value="xxxx"/>
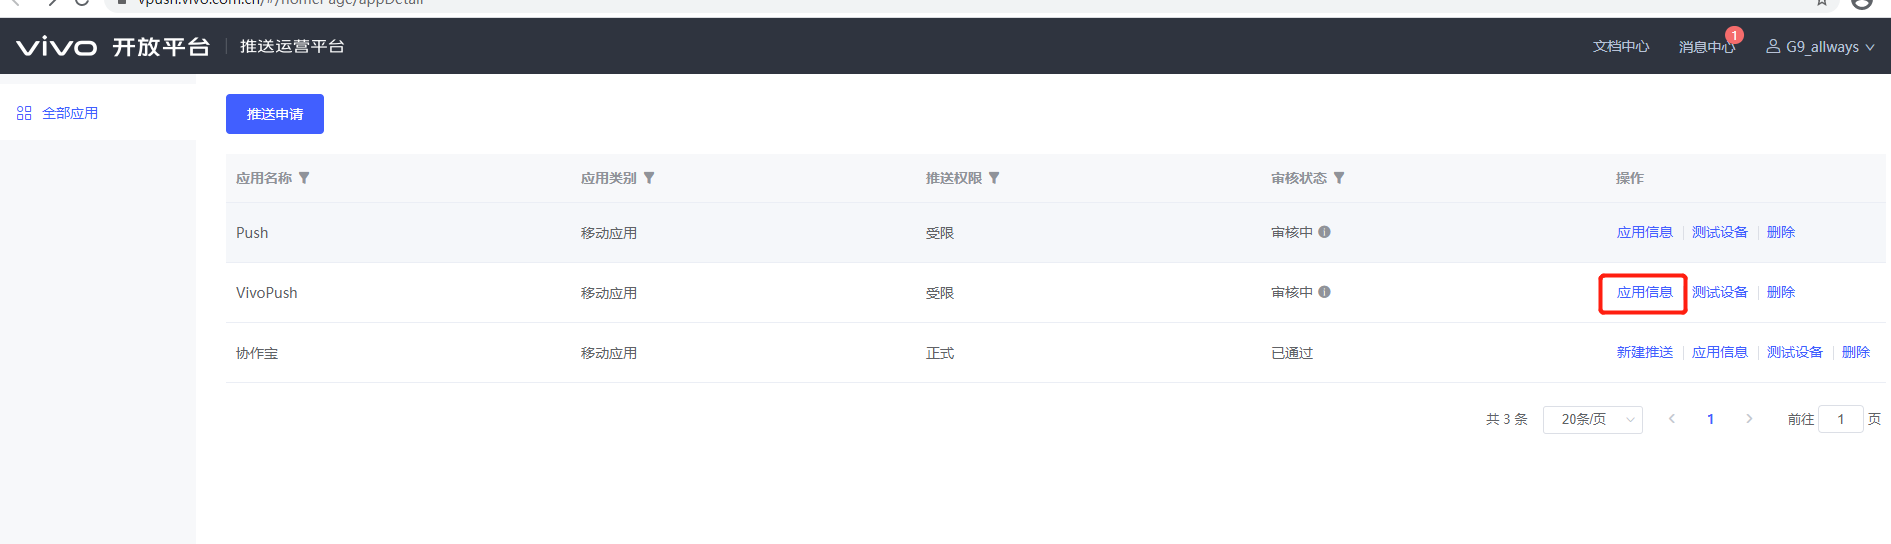
注意:点击appid 、api key等信息点击“应用信息”可查看,如下图所示:
4、在AndroidManifest文件中注册自定义通知回调类PushMessageReceiverImpl
     <receiver
        android:name=".vivo.VivoPushReceiver"
        android:exported="false">
        <intent-filter>
            <!-- 接收push消息 -->
        <action android:name="com.vivo.pushclient.action.RECEIVE" />
        </intent-filter>
     </receiver>
5、 在AndroidManifest文件中注册service 、配置sdk版本信息(仅通过jar包集成方式需要配置,通过aar包集成无需配置)
    <!--Vivo Push需要配置的service、activity-->
    <service
    android:name="com.vivo.push.sdk.service.CommandClientService"
    android:exported="true"/>

    <!--Vivo Push SDK的版本信息-->
    <meta-data
    android:name="sdk_version_vivo"
    android:value="480"/>
应用开发
自定义通知回调类
public class VivoPushReceiver extends OpenClientPushMessageReceiver {
    /**
     * TAG to Log
     */

    @Override
    public void onNotificationMessageClicked(Context context, UPSNotificationMessage msg) {
        String customContentString = msg.getSkipContent();
        String notifyString = "通知点击 msgId " + msg.getMsgId() + " ;customContent=" + customContentString;
        AppSpLog.d(notifyString);
    }

    @Override
    public void onReceiveRegId(Context context, String regId) {
        String responseString = "onReceiveRegId regId = " + regId;
        AppSpLog.d(responseString);
    }
}
启动推送
1、在在Application的onCreate函数中初始化并打开push开关
    //初始化push
    PushClient.getInstance(getApplicationContext()).initialize();

    //用于启动打开push开关
    public void bind() {
        PushClient.getInstance(context).turnOnPush(new IPushActionListener() {

            @Override
            public void onStateChanged(int state) {
                if (state != 0) {
                    AppSpLog.e("打开push异常" + state);
                } else {
                    AppSpLog.e("打开push成功" + state);

                    AppParam.pushToken = PushClient.getInstance(context).getRegId();
                    //将获取的token上传给服务器
                    AppSpConfig.getInstance().sendRegTokenToServer(new IAppSpCallback() {
                        @Override
                        public void pushInfo(AppSpModel<String> appSpModel) {

                        }

                        @Override
                        public void error(String code, String msg) {

                        }
                    });
                }
            }
        });

    }
获取Token
1、在turnOnPush回调成功之后使用PushClient.getInstance(context).getRegId()即可获取到注册id。
点击通知消息打开自定义页面
1、 在AndroidManifest.xml文件注册被启动的Activity
    <activity android:name=".Main3Activity"
        android:exported="true">
        <intent-filter>
            <action android:name="android.intent.action.VIEW" />
            <category android:name="android.intent.category.DEFAULT" />
            <category android:name="android.intent.category.BROWSABLE" />
             <!-- 路径由您自定义 -->
            <data
                android:host="com.vivo.push.notifysdk"
                android:path="/detail"
                android:scheme="vpushscheme" />
            </intent-filter>
    </activity>
注意:host、path、scheme 与后端统一即可;必须设置android:exported="true" 2、在自定义的 Main3Activity 中接收数据
    public class Main3Activity extends Activity {
        @Override
        public void onCreate(Bundle savedInstanceState) {
            super.onCreate(savedInstanceState);
            setContentView(R.layout.xxx);
            //获取通知消息的messagId
            String messageId = intent.getStringExtra("vivo_push_messageId");
            //获取自定义透传参数值
            Intent intent = getIntent();
            if (null != intent) {
                String key1 = intent.getStringExtra("key1");
                int kye2 = intent.getIntExtra("key2", -1);
            }
        }
    }
推送测试
1、应用未发布,则推送权限受限,可进行API接口测试
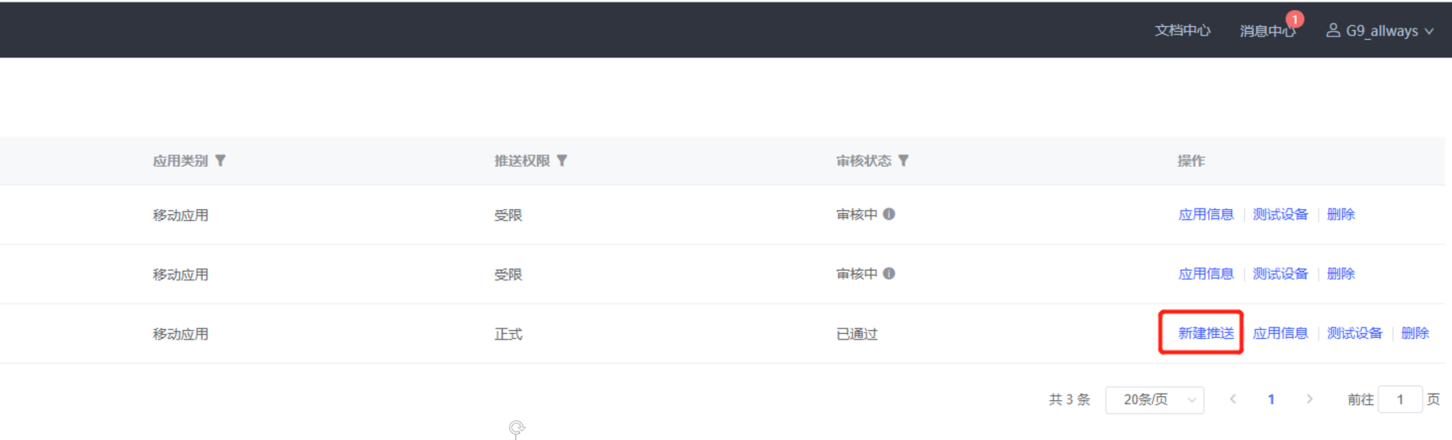
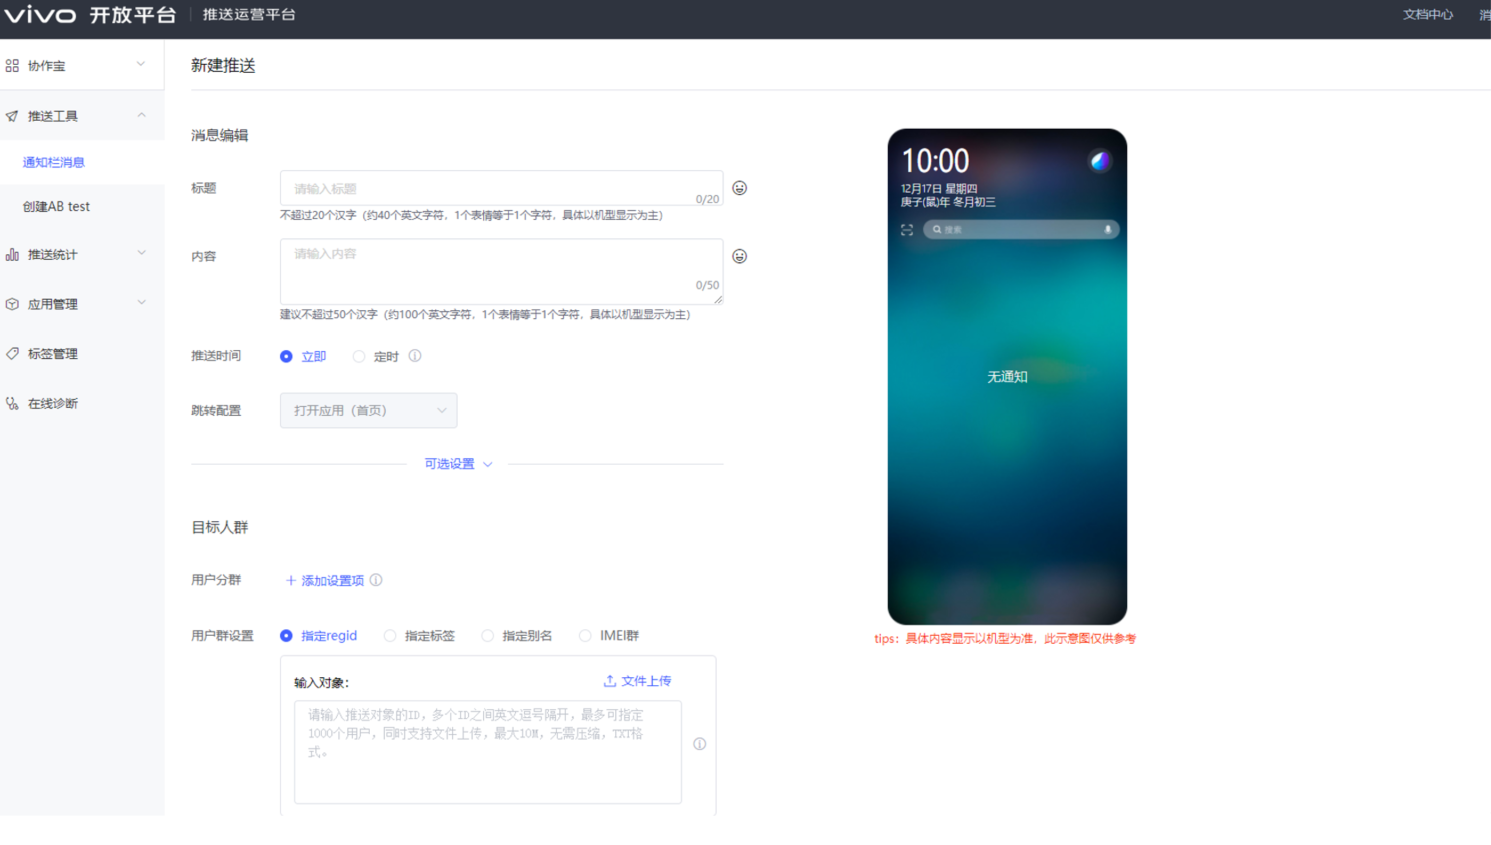
2、应用已发布,点击“新建推送”,填写推送信息,点击“确认推送”,如下图所示: